

🧰 How I Use Google Search Console With My Substack Publication
PS. It's totally free!

It’s simple. If you want to maximize traffic from Google, you need to use Google Search Console.
And you definitely want traffic from Google.
As discussed last week, 63% of all referral traffic comes from Google. Since Google traffic is demand-driven, it typically converts better than other traffic sources, too.
In fact, when I rank my publication’s traffic sources by Paid subscriptions, Google comes out on top. It drives more paid subscriptions than even Substack itself.

Google Search Console (GSC) is a free tool that helps you track and improve your ability to rank highly for relevant keywords (AKA search performance). Without it, you’re flying blind. GSC is so important that it’s the first tool I set up when I launch a new website, which leads me to my next point.
Google Search Console only starts collecting data after you set it up. This means that if you haven’t set it up yet, your past search performance data is already lost.
Even if you’re unsure how much you plan to use GSC right now, I recommend setting it up right away so it can start collecting data. You’ll be grateful you did once you’re ready to start using it!
How Google Works 🔎
Most of us are well aware of how pervasive Google Search is. What’s less common is an understanding of how Google Search actually works. But it's really important if you want to increase your traffic.
Google Search revolves around keywords.
When someone wants to search Google, they type a keyword in the search bar. In response, Google scans its database of websites (called the “Index”) and generates a prioritized list of web pages to meet the searcher's request.
We went over keywords in depth last week, so I recommend reading that article first if you haven’t already.

Today, I want to discuss what happens after the searcher types in that keyword.
Google uses thousands of factors to determine which web pages should show and in which order.
You don’t need to memorize all the ranking factors to be successful with search engine optimization. You just need to remember this: Google is a business.
The more frequently people make Google searches, the more money Google makes. So, Google wants people to keep making searches. If searchers are unhappy with their results, they will eventually switch to something else. Every factor Google considers boils down to ensuring searchers have a good user experience.
To rank highly, your content must address what the searcher seeks. However, it must also load quickly and function well on their device. Otherwise, they won’t be happy—and Google doesn't want that.
Google needs to crawl and index your website.
Google can only show your website in search results if it is in their index. If that sounds like a lot of websites, that’s because it is! The Google Search Index contains hundreds of billions of web pages.1
To index a new website, Google “crawls” it. This means Google scans the website and notes all of its content, how it functions, and how its pages are connected to each other and other websites.
These days, most websites are discovered naturally by Google, but you can hasten this process with Google Search Console. Once Google discovers your website, it will continue to crawl it regularly and update the information in the Google Search Index.
Google Search Console is a link between you and Google.
One of the most frustrating things about doing search engine optimization is that it’s very difficult to speak directly with anyone from Google to understand what they are looking for and if you’re doing it right.
Google Search Console is an incredible tool because it creates two-way communication with Google:
You can share information with Google to help it crawl and index your pages so you can be included in relevant search results.
Google can share information with you, such as when it’s having trouble accessing your website or if it’s concerned you’ve done something spammy that needs rectification before you can rank highly.
How I Use Google Search Console 📈
With this two-way communication established, lots of useful information about your site’s search performance becomes available.
A few of my favorite Google Search Console features are:
Keyword Performance: See which keywords I rank for, my average position in the search results, and how many clicks each one gets.
Indexing: Ensure that Google can crawl my website and index the pages I want to appear in search results.
Experience: Identify issues on my website that may impact search performance, such as broken links, slow-loading pages, and pages that don’t work on mobile.
Manual Actions: Get notified of any penalties from Google impacting my ability to rank highly.
Links: See which websites link to me and which pages have the most internal and external backlinks.
I’ll share how I use the keyword performance feature in detail next week, so be sure to subscribe so you don’t miss out!
How to Set Up Google Search Console 💻
You need to claim website ownership before you can use Google Search Console. This means your competitors cannot access your website in GSC.
Note: If you want a vendor you work with, such as a marketing agency, to have access to your GSC data, you can grant them access.
To get started with GSC, log into your Google account. If you don’t have one, create one first. A Google Account is how you access all of Google’s tools, including Gmail and Google Search Console.
While logged into your Google account, navigate to the Google Search Console website and click “Start Now.”

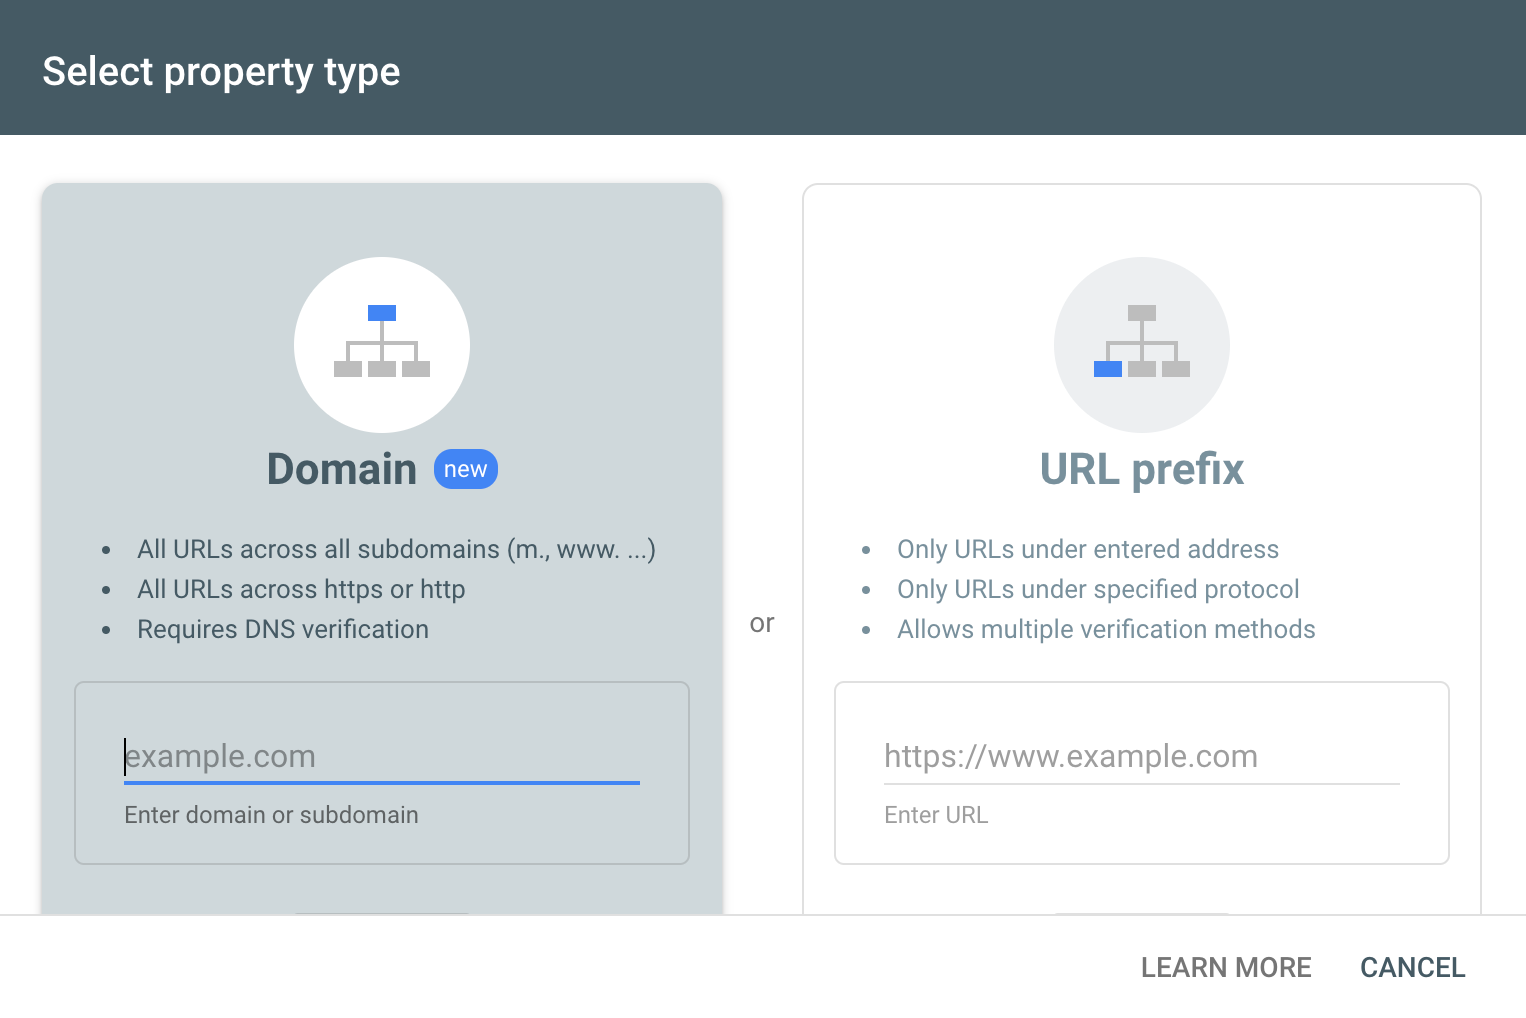
You’ll be prompted to add your website one of two ways:
Domain is the preferred method because it captures all the pages on your website but requires a custom domain.
URL Prefix is better if your website is hosted on a domain name you don’t own (e.g., publicationname.substack.com or storename.myshopify.com).
Adding a Website (Including a Substack Publication) as a Domain
Remember, you must use a custom domain for this option.
Start by adding your website URL to the field in the Domain box and clicking continue. You don’t need to add www or https because it will access all the versions of your website.

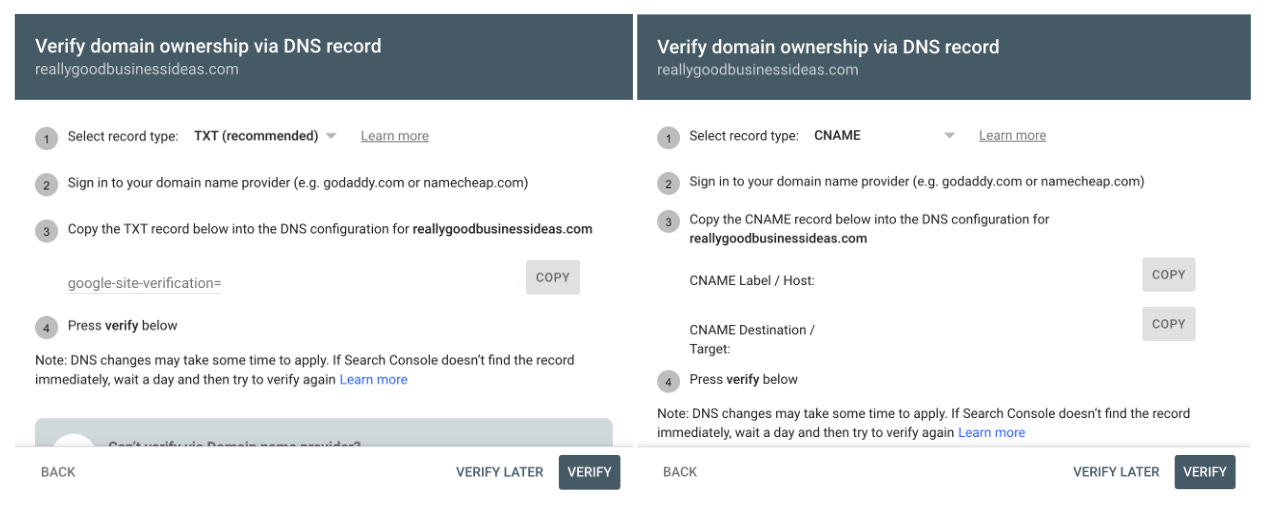
After you click continue, you’ll be prompted to verify your ownership of this domain.
You can verify your domain using TXT or CNAME. Both are accessible from your domain name provider, but TXT is easier for most people. Copy the TXT record and log into your domain name provider.
I know this will feel intimidating for many people, but editing your domain name records is usually much easier than you think. Most domain name providers also have tutorials on how to edit their records. Some even have tutorials specifically for Google Search Console verification.
Here’s what it looks like when I verify my domain in Namecheap.
First, I select the correct domain from my domain list. Then, I navigate to “Advanced DNS” for that domain.

Then, I scroll down to “Host Records” and select “Add Record” at the bottom.

Then, I select “TXT Record” from the dropdown.

Finally, I fill in the record:
Host: @
The @ symbol represents your root domain (e.g., reallygoodbusinessideas.com).
Value: google-site-verification=….
This is where you would paste the TXT record from Google Search Console.
TTL: Automatic
TTL stands for “time to live” and defines how quickly servers should update their data to show the new value. In this case, I left it at the Namecheap default, “Automatic.”
Once I’ve filled in the record, I click save and head back to GSC to complete the verification by clicking “Verify.”
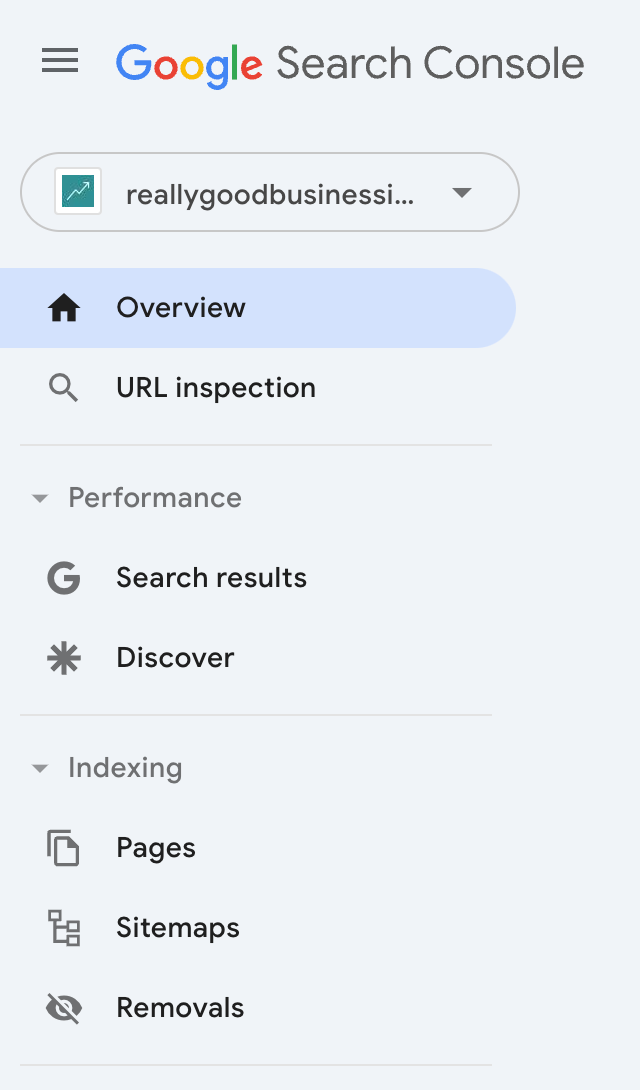
Once verified, you can access your property in Google Search Console. Note that it may take up to 24 hours for Google to verify your website. If it doesn’t work immediately, wait 24 hours and then try again.
Data starts accumulating from the day your property is verified, so I recommend waiting a week before returning to review it.
Adding a Substack Publication Using URL Prefix
If you don't have a custom domain, you can verify ownership using the URL prefix method. Most website builder platforms, like Substack, make this very easy.
First, enter your homepage URL in the URL Prefix box and click continue. I recommend loading your homepage and copying it from the URL bar to ensure you have the correct one.

Next, you’ll be given the option to verify ownership using an HTML file.

Sustack users should click the arrow on the right to compress this option and see the complete list.

Then, select “Google Tag Manager.”

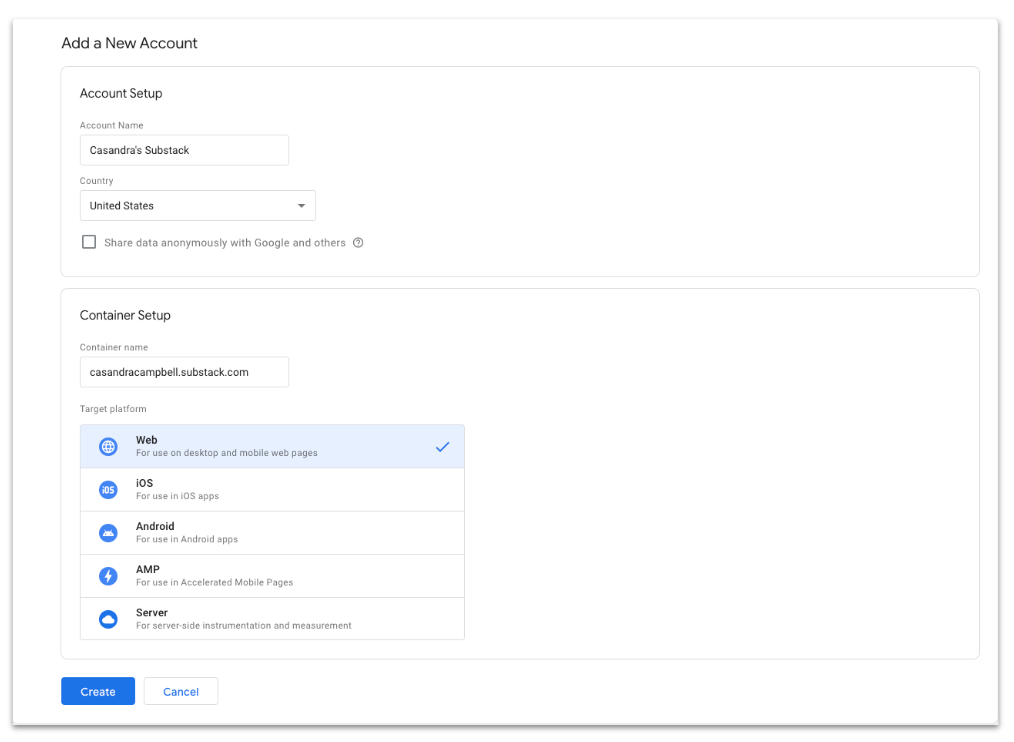
Next, open Google Tag Manager and click “Create Account.”
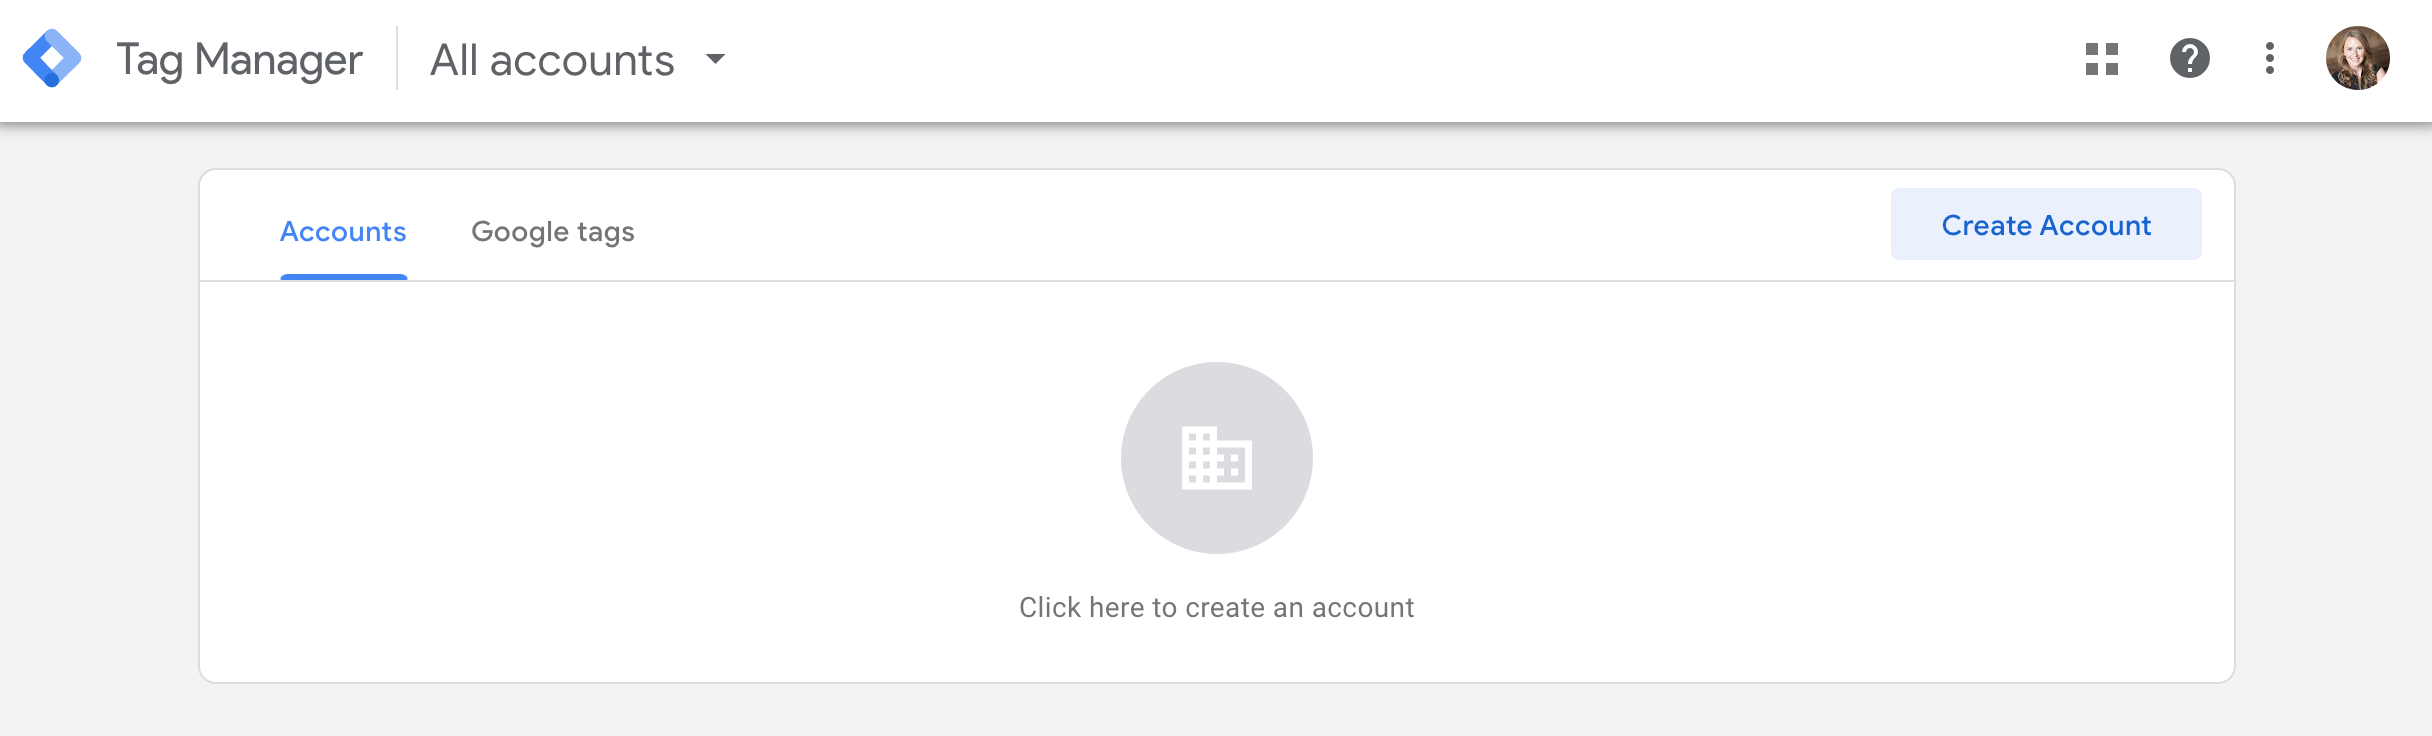
Name your Account, name your Container, select “Web” and click “Create.”
You’ll be prompted to install Google Tag Manager on your website. Substack users can skip this step by clicking “OK.” We’ll use an easier method.

After you click “OK,” find your Google Tag Manager ID in the top right, written in blue. It should start with “GTM.” Copy the entire ID.

Now, navigate to your publication’s “Settings,” scroll down to “Analytics,” and paste the ID in the field labeled “Google Tag Manager ID”. Click “Save.”

Finally, head back to Google Search Console to complete the verification by clicking “Verify.”
Once verified, you can access your property in GSC.

Data starts accumulating from the day you add your property, so I recommend waiting a week before returning to review it.
How to Use Search Console Data
Next week, I’ll show you how I optimize my content using Google Search Console keyword performance data. I recommend you set up GSC today so that you’ll have a week’s worth of keyword data to optimize alongside me next week.
Be sure to subscribe so you don’t miss it!
To endless possibilities,
Casandra
PS. If you found this useful, please tap the ❤️ below. It helps me out a lot!
I didn't know this was possible. Thanks
Really interesting. Ty!