

How to Filter Your Substack Subscribers by Section
A practical guide to seeing who’s subscribed to what (and how to use it).

Substack sections are one of the most underutilized features on the platform:
They let you publish different kinds of content without trying to grow multiple publications at the same time.
They give readers control over what shows up in their inbox.
They let paid subscribers pay only once, even as you expand what you publish, rather than asking your most loyal readers to subscribe (and pay) again.

Less obviously, sections also segment your audience in the background.
Every time a reader opts into (or out of) a section, they’re telling you what they want and what they don’t. You’re not tagging or filtering people manually, but over time, those choices quietly organize your subscriber base by interest.
The question is how to actually see that segmentation and what to do with it.
In this guide, I’ll show how to filter your subscribers by section inside Substack, what those filters reveal, and when it makes sense to email a specific section outside of publishing a new post.
Why Filtering Your Subscribers By Substack Section Is Useful
Filtering your subscribers by section lets you:
See how interest actually breaks down across your publication.
Identify overlap (and separation) between different topics.
Understand which sections attract your most engaged or committed readers.
Understand which sections your paid subscribers are most interested in.
Email all or a subset of subscribers of a specific section.
This is especially useful once your publication grows beyond a single, tightly focused topic. The more you expand, the more important relevance becomes, and filtering by section lets you act on that relevance right here on Substack.
How to Filter Your Substack Subscribers By Section (Step by Step)
To filter your Substack subscribers by section, start visiting your Subscribers page from the sidebar of your publication’s dashboard.
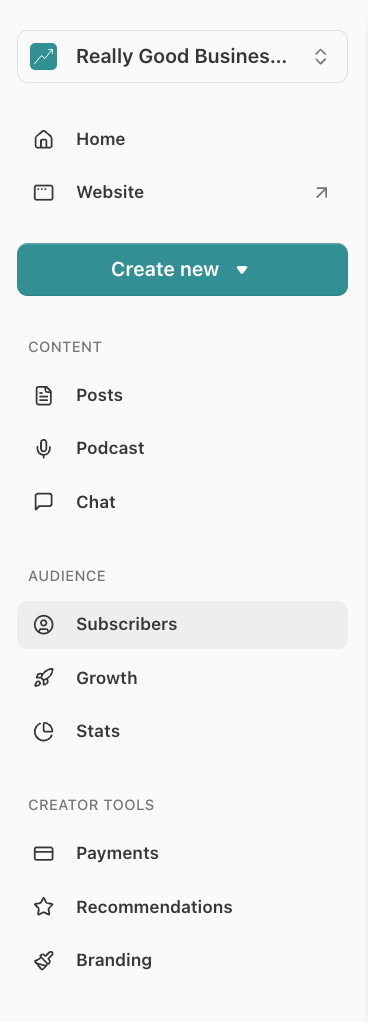
In the top right of your Subscribers page, you’ll see a “Filter” button. Click on it to expand the filter menu.

Using the “Type” dropdown on the left, scroll down and select “Section". Now you can use the remaining two dropdowns to choose which sections to filter your subscribers by.
The second dropdown lets you choose how you want to filter your section subscribers.
Includes any of: Shows subscribers who are subscribed to at least one of the selected sections.
Includes all of: Shows subscribers who are subscribed to every selected section.
Includes none of: Shows subscribers who are not subscribed to any of the selected sections
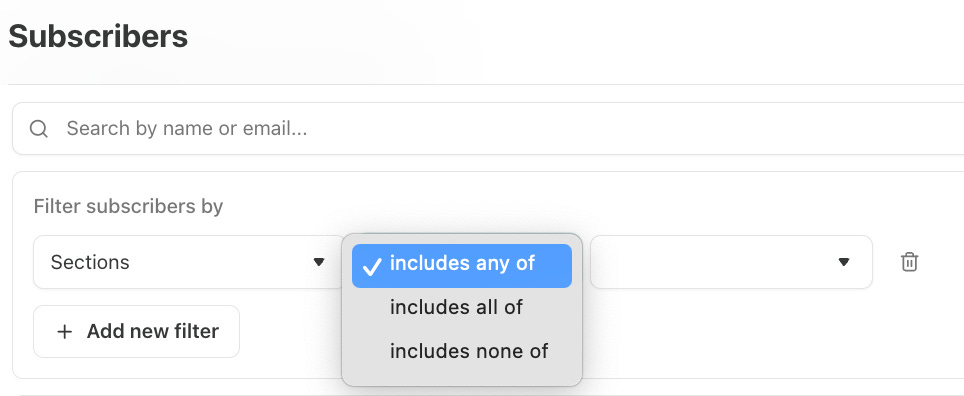
The third dropdown lets you choose which sections to apply the filters to. You may select one or as many of your sections as you want.
After you’ve made your selections, click “Save changes” on the right side to update your subscriber list. The number of subscribers that meet your criteria will populate in the top left and your list will update to only show the subscribers that meet the criteria.

Here are some quick views to explore:
By selecting each section one at a time, using the “Includes any of” or “Includes all of” filters, you can see how many people are subscribed to each individual section.
By selecting all your sections and using the “Includes all of” filter, you can see how people are subscribed to all your sections.
When I look at how many readers are subscribed to all my sections, I can see that 97% are. Although sections are often a better choice than creating different multiple publications, if you see that the number of people who subscribe to all your sections is low, that might be a sign that your content is too diverse and multiple publications may actually make more sense for you.
You can also combine filters to get more specific. Here are three examples to get you started.
1. Compare Overlap Between Sections
To see subscribers who are only subscribed to a single section, use two filters together:
First, using the “Section” filter type, select “Includes all of” and select the section you want to analyze.
Then, add a second filter using the Section type and select “Includes none of” and select all your remaining sections.
After you save your changes, your subscriber list will be updated to show only subscribers who are opted into that one section and are not opted into any others. In other words, you’re looking at readers who have clearly said: this is the only content I want from you.
You can repeat this for each section to understand how big their unique, nonoverlapping audiences are.

2. Compare Paid Subscribers Between Sections
To see how many paid subscribers are subscribed to each individual section, use two filters together:
First, using the “Section” filter type, select “Includes all of” and then select the specific section you’re analyzing first.
Next, select the “Can see paid content” for your filter type, and then select “Is” and “True” from the remaining dropdowns.
After you save your changes, your subscriber list will update to show you how many paid subscribers are subscribed to that section, which you can compare to your total number of paid subscribers.
You can then repeat this for each section to compare and see if your paid subscribers are disproportionately interested in a specific section.

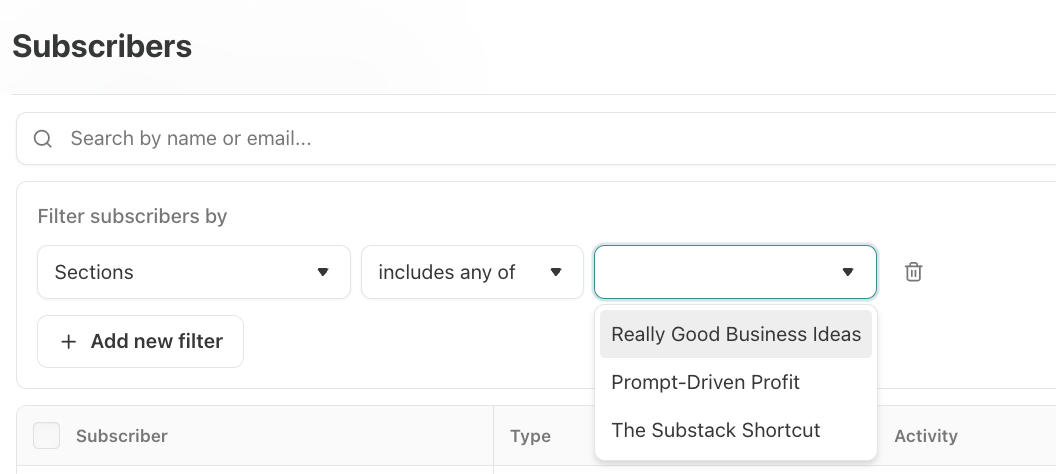
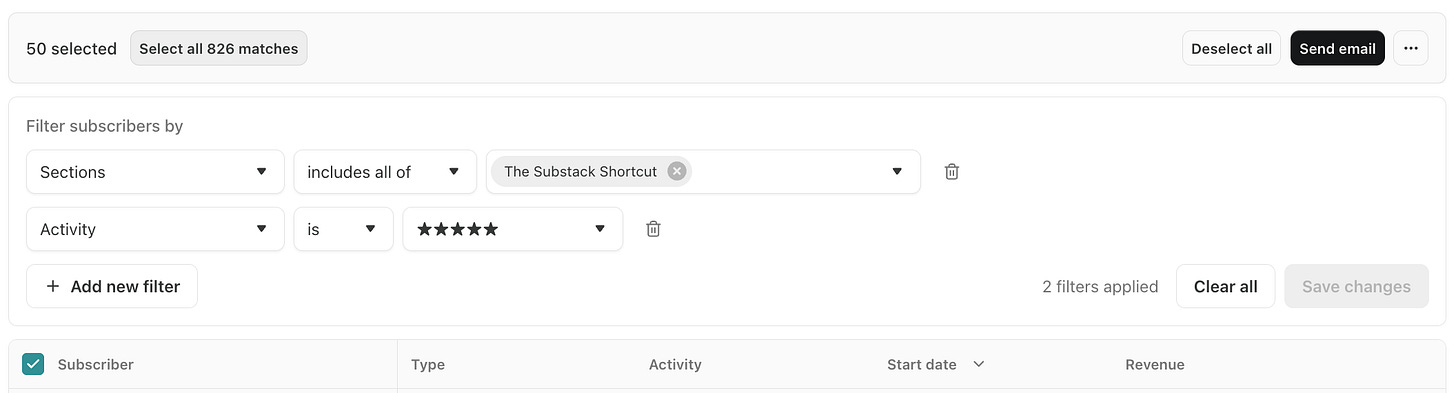
3. Compare Activity Levels Between Sections
To see which sections have the most highly engaged subscribers, use two filters together:
First, using the “Sections” type, select “Includes all of” and the section you want to analyze.
Next, choose the “Activity” filter type, select “Is,” and select five stars to target your most engaged subscribers.
After you save your changes, your subscriber list will update to show you only your most engaged subscribers for that section.
You can repeat this for each section and compare to see if one section has more highly engaged subscribers than the others.

The Sky’s the Limit (Almost)
There are many more options for filtering your section subscribers depending on your research goals, so don’t be afraid to play around. For example, if you have different sections targeted to different regions, you might want to filter your subscribers by region for analysis. Knowing that most of your Canadian news section subscribers live in the US might inform your content strategy, for example.
How to Email Subscribers in a Specific Section
The simplest way to email all the subscribers of a specific section is to publish a post to that section just as you normally would.
But what if you don’t want your email to appear on your publication as a post? For example, if you were sending a reminder email about a special offer. Or what if you only want to email a subset of a section’s subscribers? For example, to run an audience survey on your most engaged subscribers of a specific section.
That’s where a hidden feature that lets you email a segment of Substack subscribers without publishing a post comes in!

Emailing a specific segment of subscribers, including those from a specific section, starts by filtering your subscribers for only those you want to email.
For example, if I wanted to run an audience survey to get input on what topics the most engaged subscribers to my Substack Shortcut are interested in, I would filter my subscribers in this way:
“Sections” filter type + “Includes all of” + “The Substack Shortcut” (my section for Substack content).
“Activity” filter type + “Is” + five stars.
Save changes.

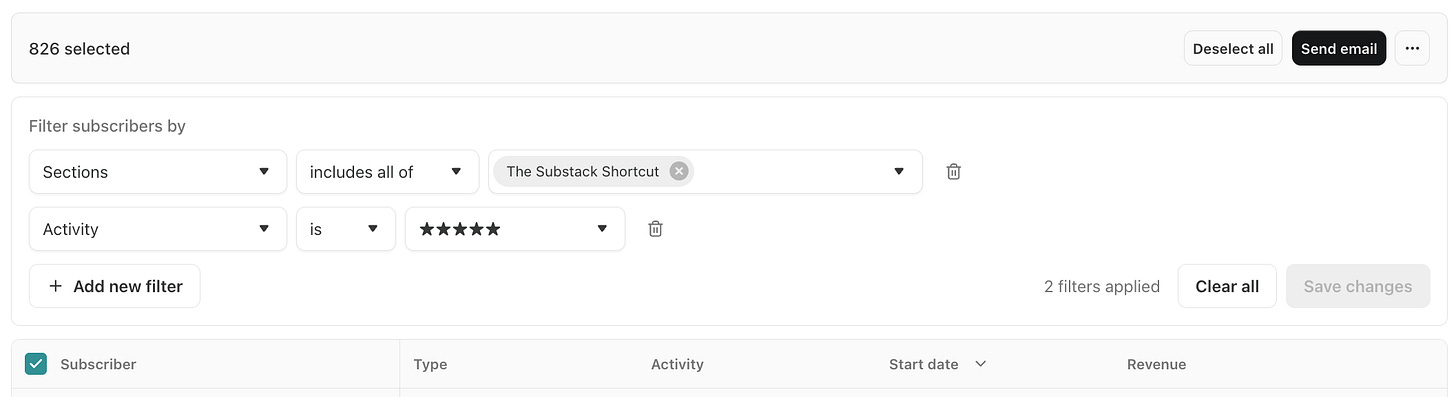
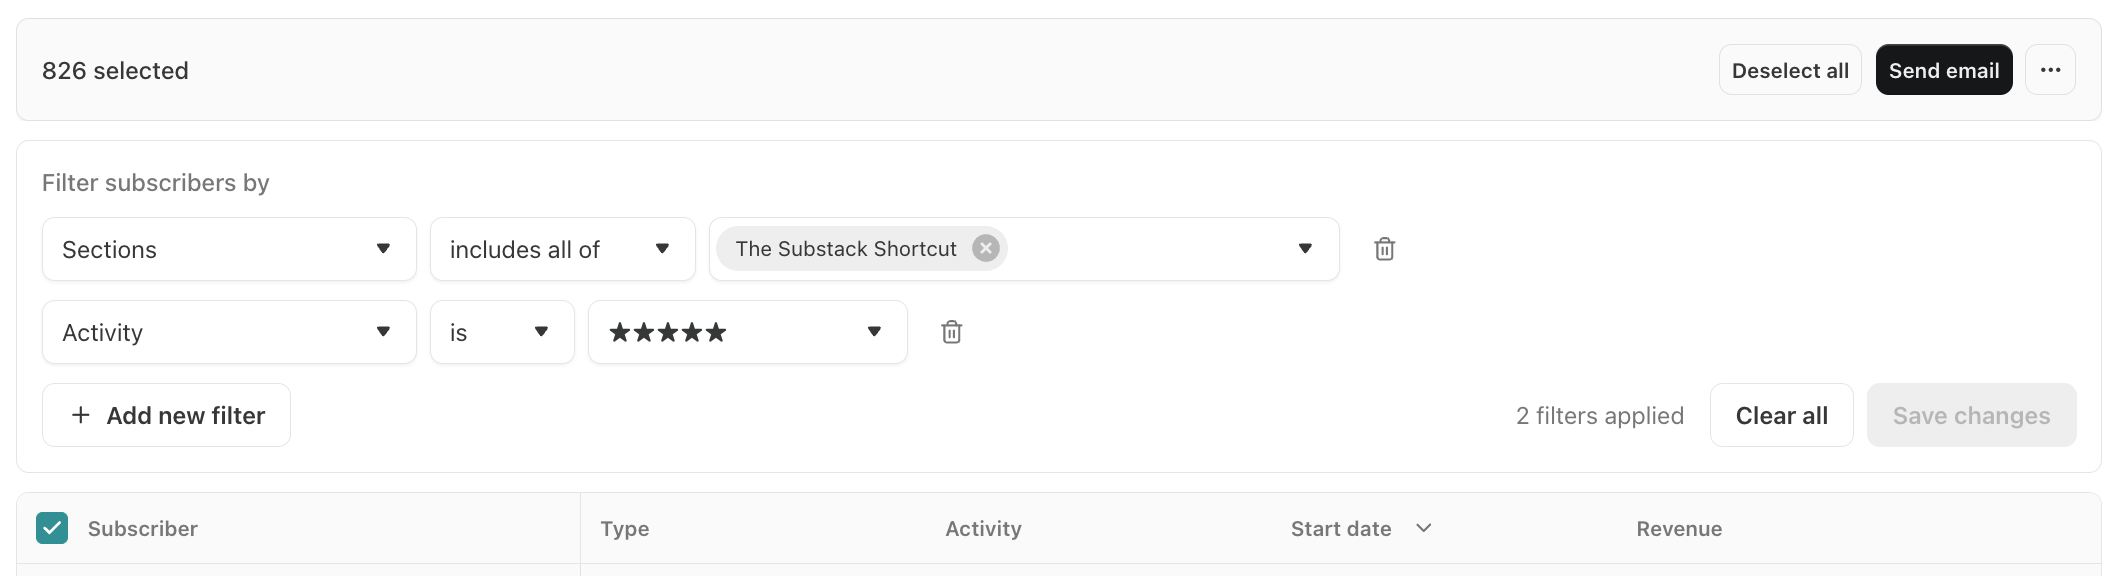
Now, in order to email this audience, I need to click three things:
Select the “Subscribers” check box at the top of your filtered list on the left side. Note that this will only select the subscribers on your first page of results.
Next, above your filter, you should see a message showing how many subscribers were selected (this will be your first page of subscribers only). If you have more than one page of matching results (more than 50 subscribers), you will see an option next to that message to select all the subscribers that match your filters.
Once you have selected all your matching subscribers, the message will update to confirm it.
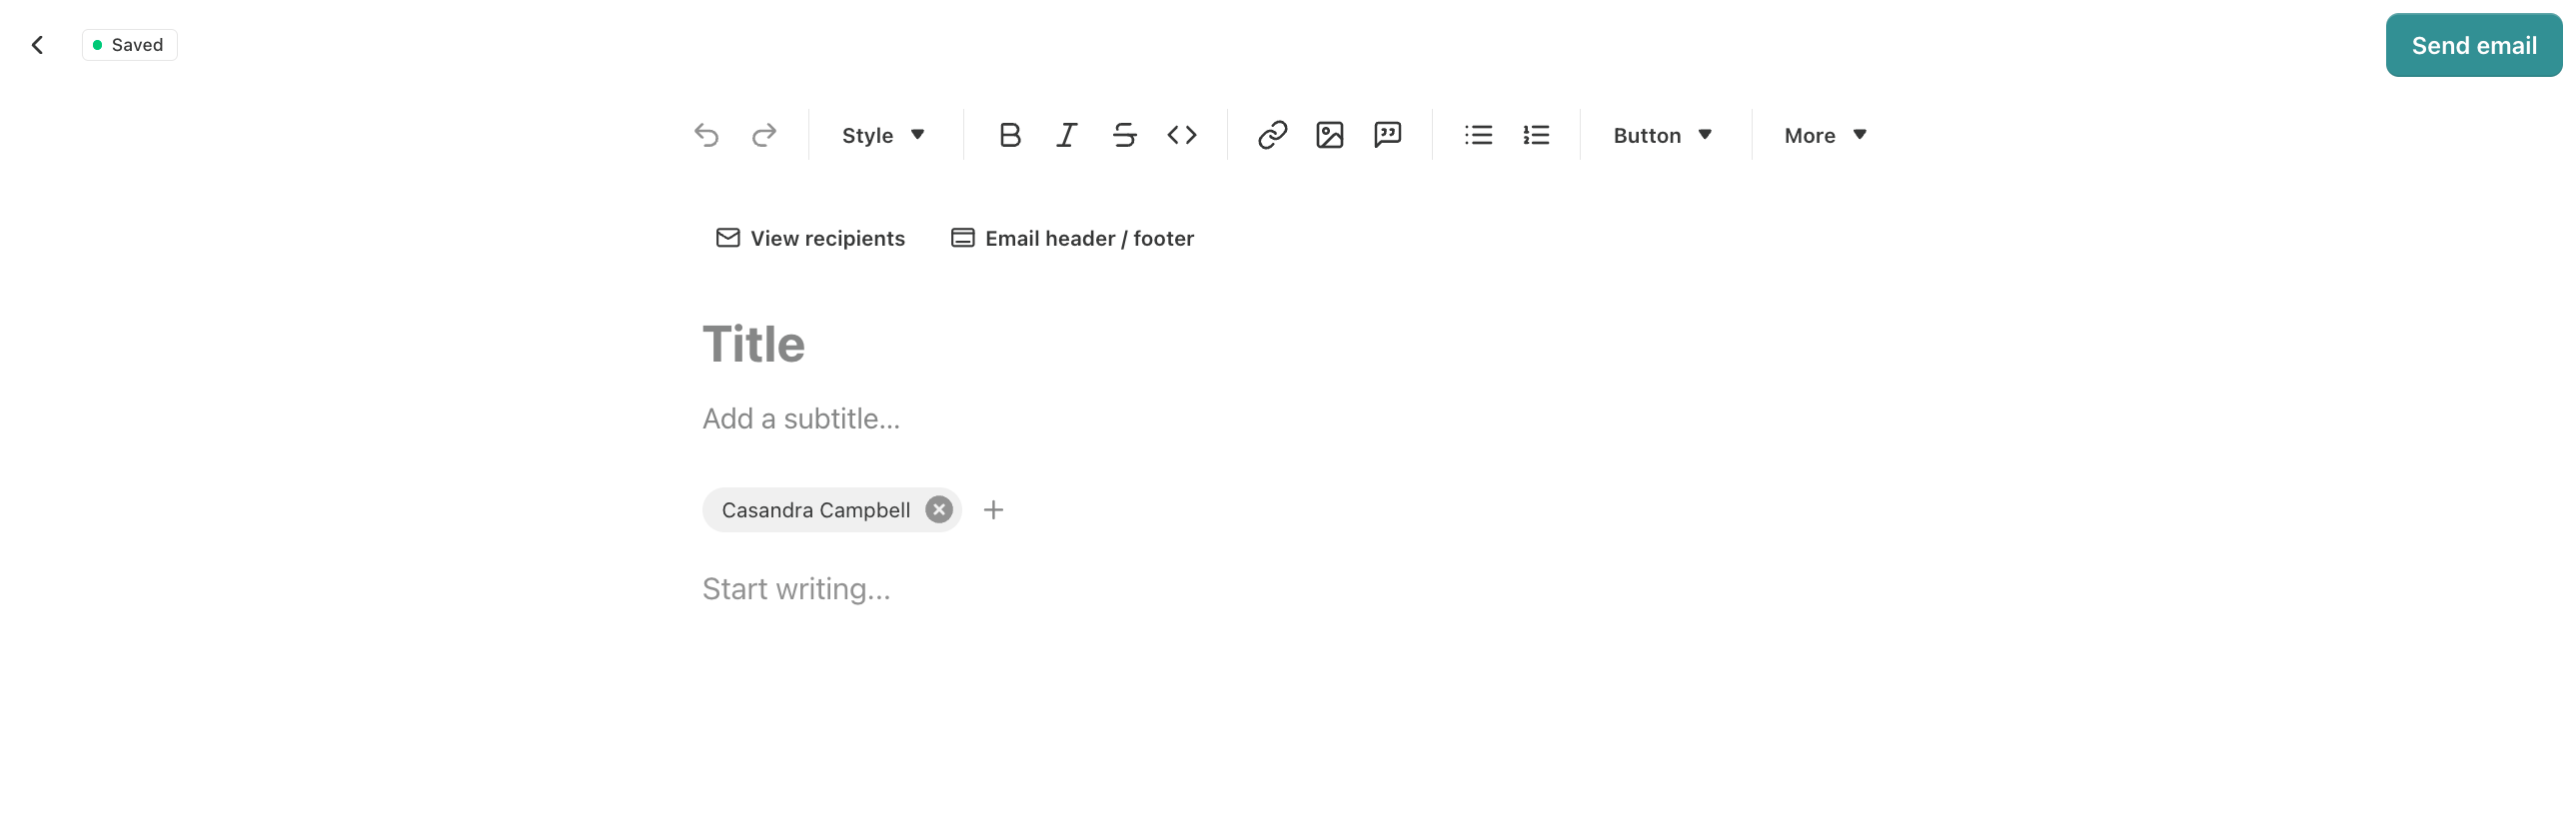
Finally, once all your matching subscribers are selected, click the “Send email” button in the top-right corner. You will then be taken to the email editor to draft and send (or schedule) your email.

The email editor looks remarkably similar to the post editor. If you save a draft to come back to later, you’ll find it in your Posts’ Drafts folder along with an “Email” tag.


A Final Note on Using Section Filters Thoughtfully
Filtering subscribers by section isn’t about sending more emails. It’s about sending fewer, better ones.
Sections already ask readers to raise their hands for what they want. Filtering by section simply lets you see (and respect) those choices. Used well, it helps you understand where interests overlap, where they don’t, and where engagement and paid support are actually concentrated.
It’s a simple tool, but it supports thoughtful growth by helping you better understand and meet your readers’ needs.
To endless possibilities,
Casandra
P.S. If you’re thinking more intentionally about your publication’s structure, the Substack Creator OS is where I keep all of this organized in one place. The content calendar makes it easy to plan by section, and connects your publishing schedule directly to growth tactics (like keyword research and promotion) and monetization strategies (like products and sponsorships).
Right now, the Substack Creator OS is free for Really Good Business Ideas Premium subscribers, so sign up today to get your copy.
Upgrade now and get instant access to the Substack Creator OS.

I really enjoyed this. Your emphasis on relevance and respect for subscriber choice really shines through in the article and the practicality is just up my street. Thanks for the post.
Great post about using the sections! I've used sections, but never emailed just a subset of subscribers.
I have another question about separating two publications from one owner to two different email addresses. I started two very different newsletters on the same email account, not knowing at the time that notes and comments are attached to the profile, not the newsletter. For a few months now, I’ve been frozen into inaction by the fear that what I do for one newsletter can be damaging for the other one. (They're even in different languages! An English speaker would unsubscribe if she saw some note in a foreign language.)
I have 200+ subscribers for one and 670 subscribers for the other and I can grow them much more than that. But I don't know how to separate them on different email addresses. I contacted Substack Support (their AI chatbot) but nothing happened.
Do you have any advice for how to transfer ownership of one newsletter to another email address? Thanks so much for any help you can provide!