

Don’t Lose Your Newsletter: The Step-By-Step Guide to Backing Up Your Substack
If your Substack disappeared tomorrow, would you be ready? Here’s the backup plan every creator needs.

Imagine waking up one morning, grabbing your coffee, opening your laptop, and your entire Substack is gone.
Your posts, your drafts, your subscribers…everything.
It sounds impossible, like something that could only happen to other people, but it’s more common than you might think. Accounts get suspended, people accidentally delete things they can’t get back, and sometimes platforms just glitch.
Most creators don’t realize how vulnerable they are until something breaks.
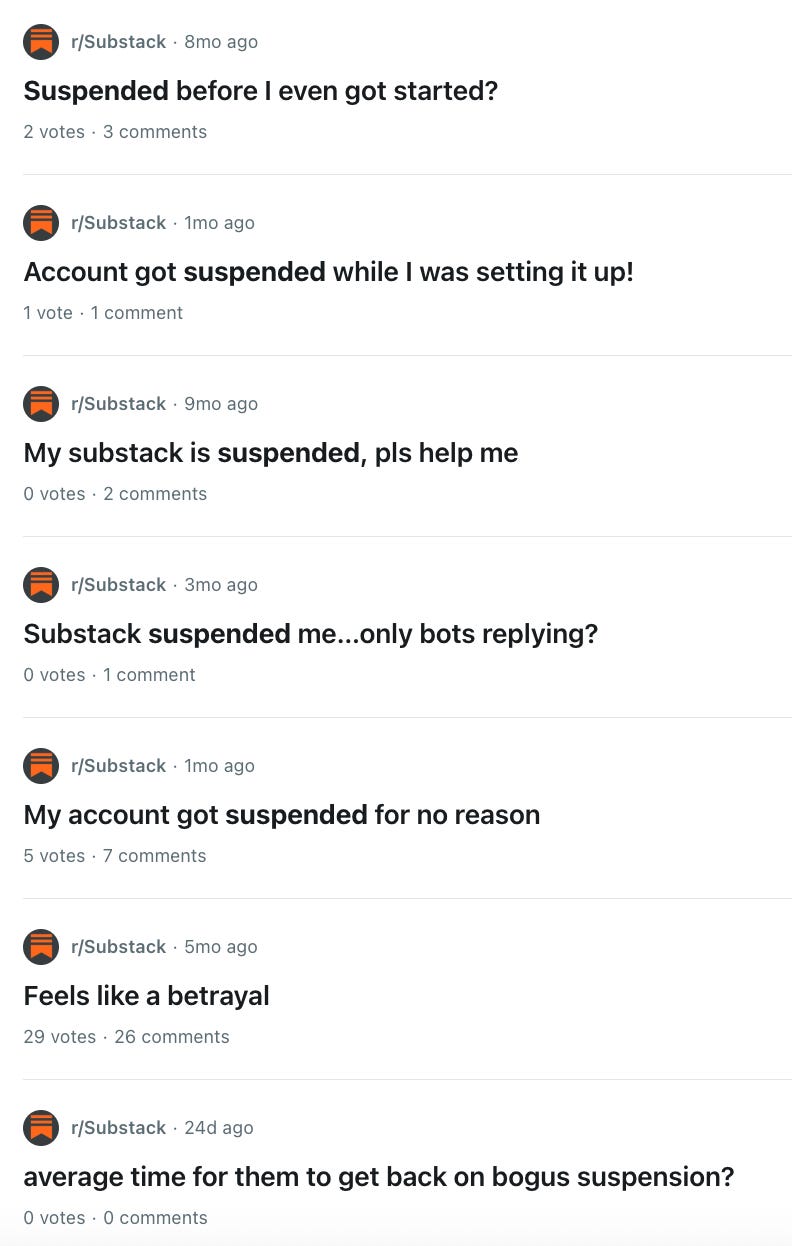
Reddit is full of people reporting that their accounts were suspended. While some of these people are likely bad actors who violated Substack’s terms of service, mistakes do happen. Sometimes people don’t even realize they did anything wrong; other times, Substack may have made a mistake. Unfortunately, regardless of the cause, most are unable to undo the suspensions.
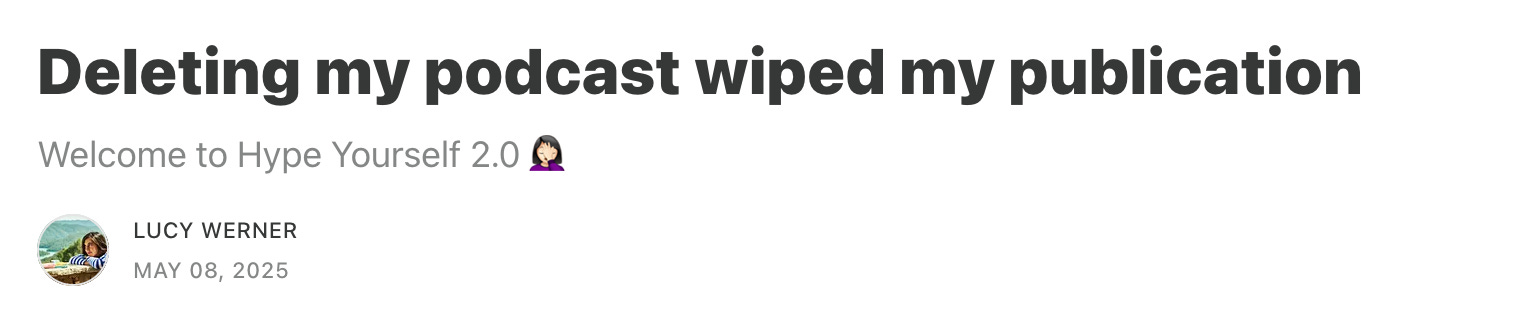
And it’s not just account suspensions you need to be worried about. Sometimes, a platform bug or a misleading user experience can lead to you losing everything. Lucy Werner learned this the hard way when her entire publication got wiped after she deleted an unused podcast feed. She lost all her subscribers, content, and engagement, and had no backup. Unfortunately, Substack was unable to help her fully recover her publication, and she ultimately decided to rebuild elsewhere.
These kinds of risks are present on any platform and it’s scary. But the good news is that with the right system in place, you never have to worry about losing your work, your audience, or your revenue. You can build simple layers of protection that make your Substack nearly disaster-proof.
In this guide, I’ll walk you through the four layers of a fully backed-up Substack, from platform exports to off-platform drafts to mirrored email copies to the built-in safety net you already have through Stripe.
By the end, you’ll know exactly how to protect your writing, your readers, and your business, so you’ll be safe even if the worst-case scenario actually happens.
Substack Backup Layer 1: The Platform Export
If you only do one thing from this entire guide, let it be this.
A weekly Substack export is the single easiest step you can take — and it gets you 80% of the way to having a fully backed-up newsletter.
It’s one click. It takes 30 seconds. And it gives you a solid snapshot of the most important parts of your publication:
Your full subscriber list with details like subscription data and plan type for paid subscribers.
A full list of your published posts with details like publish date, post ID, and audience (free or paid).
HTML versions of your posts, including text and images.
If something ever goes wrong (an account lockout, glitch, migration issue, or just human error), this is the file that saves the day. It’s your “I can rebuild everything if I have to” safety net.
My recommendation: Make it a weekly ritual. Every Friday afternoon (or whatever time works for you), queue up an export.
How to Export Your Substack
To export your Substack, visit your Substack’s dashboard and click on “Settings.”
Next, find “Import / Export” on your Settings sidebar. Then click “New Export” to start the export process. It’ll take a few minutes for Substack to build your export ZIP file, then click the download icon.
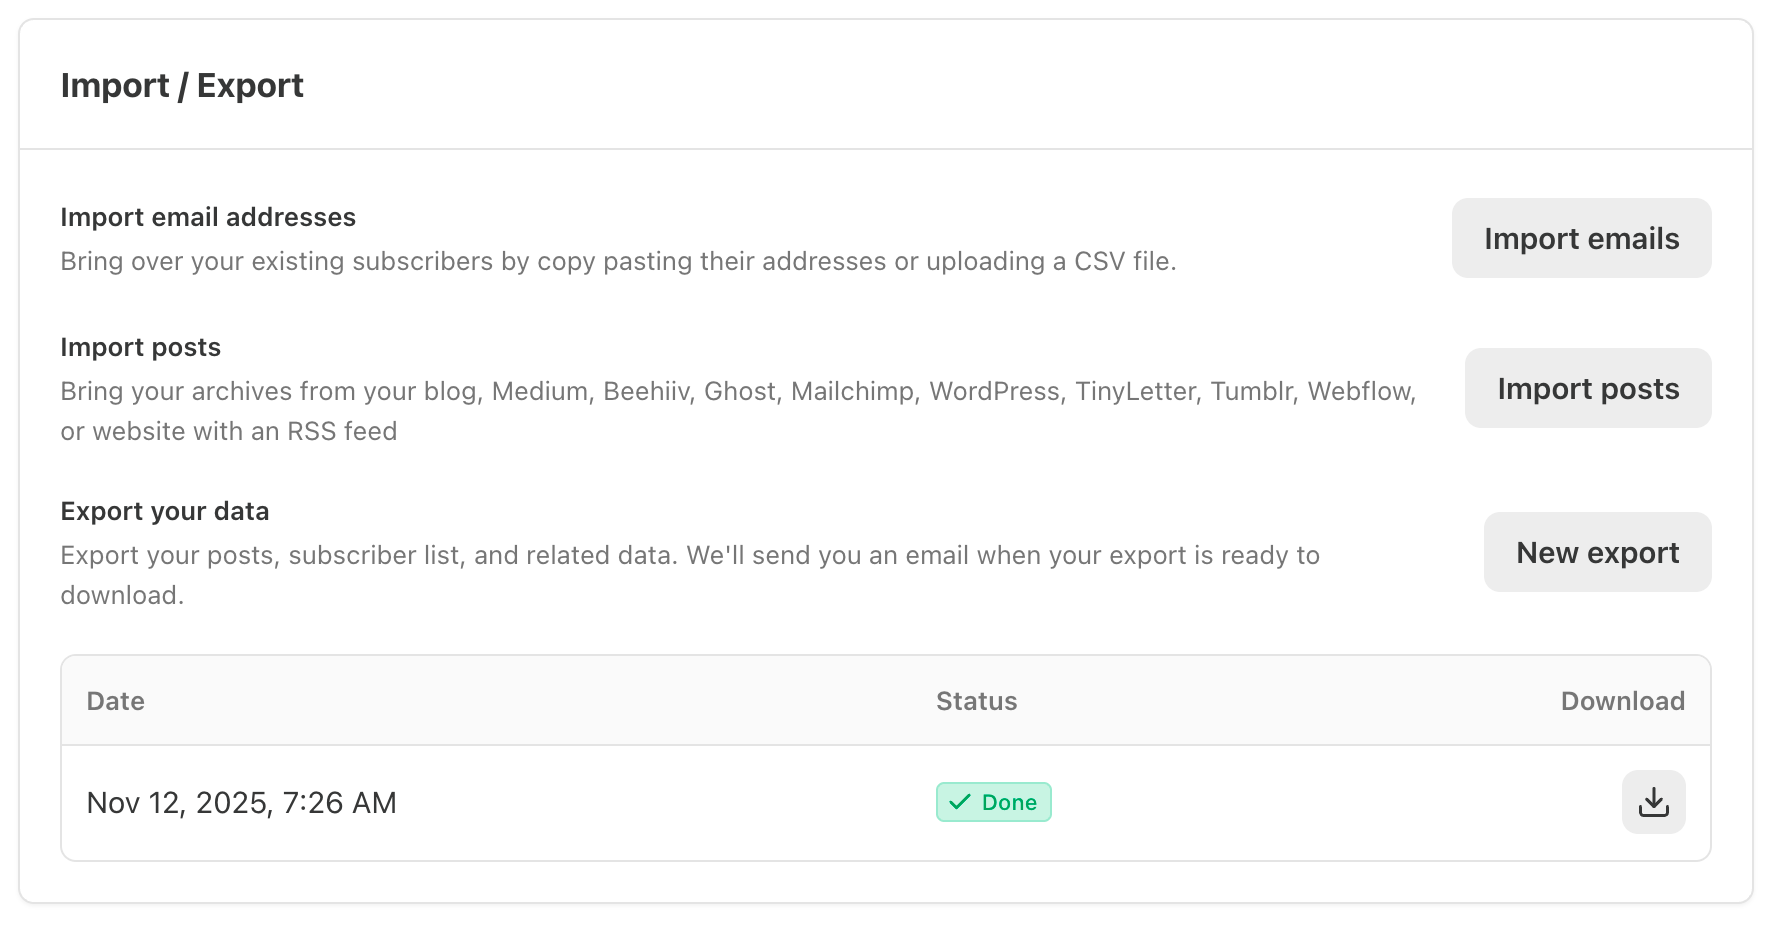
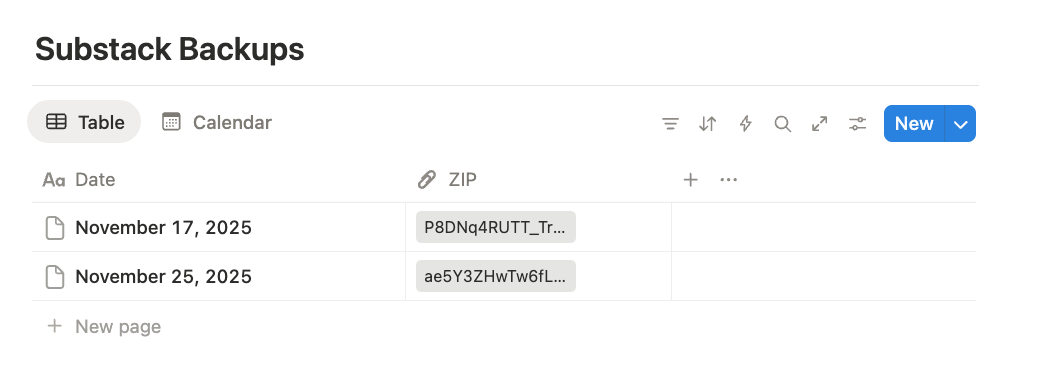
Once you have the file downloaded, you can upload it to a safe place (like Google Drive or the Substack Creator OS).
Substack Backup Layer 2: The Brand Vault
Your weekly export protects your content.
But if you ever had to rebuild your Substack from scratch, you’d quickly realize that your publication is more than your posts.
It’s your voice, settings, and visual identity. All the pieces that make your newsletter feel like you.
That’s what Layer 2 protects. The brand vault is a simple folder (or Notion workspace) where you store every asset that defines your publication:
Your About page (with all formatting + images).
Brand colors + hex codes.
Typography choices.
Your Substack visuals.
Common CTA wording.
Your publication’s short description.
Your publication’s tagline.
Your welcome emails.
Pricing info + what paid perks are included.
Templates (post formats, recurring series).
This is all the stuff you’d otherwise scramble to recreate from memory.
If you ever need to migrate platforms or rebuild after an account wipeout, your entire identity is already documented, organized, and ready to plug back in.
It also makes you a more consistent creator. When your brand assets live in one easy-to-reference place, your voice, visuals, and structure stay sharp: no reinventing the wheel every time you publish.
Substack Backup Layer 3: The Email Mirror
Even with a full export and a brand vault, there’s one thing Substack can’t preserve perfectly: how your newsletter actually looked the moment it hit inboxes.
That’s why Layer 3 is the Email Mirror: a simple, foolproof way to keep an exact, time-stamped, fully formatted copy of every post you’ve ever sent.
Designs change, and content updates happen, but your inbox? That’s the one place where your newsletter stays frozen exactly as it was delivered.
To set up the third layer of protection, subscribe to your own publication with two different email addresses:
Email #1: Free subscriber version.
Email #2: Paid subscriber version (you can comp yourself).
Every time you publish, you’ll receive the exact emails as your subscribers with all the original formatting, subject lines, images, links, text, and calls to action. These emails become your independent archive, untouched by Substack’s interface or any future platform changes.
And if you ever need to replatform or rebuild your archive, your entire newsletter history is sitting right in your inbox exactly as it originally appeared, ready to be copied over.
This is one of the easiest layers to maintain; it runs automatically once set up and provides a level of redundancy that even Substack can’t offer on its own.


Substack Backup Layer 4: The Revenue Layer (Stripe Ownership)
Most creators don’t think about what would happen to their subscription revenue if something went wrong with their Substack account. But this is actually the strongest layer of your entire backup system, because your revenue doesn’t technically live inside Substack at all. It lives in your own personal Stripe account.
When you enable paid subscriptions, Substack connects your publication directly to your own Stripe account. From that moment forward, Stripe becomes the system of record for your business. You hold full ownership of all paid subscriptions and the associated information (email addresses, payment history, subscription start dates, renewal schedules, and billing status). Substack can facilitate the relationship, but it does not control it.
This matters because it gives you something most platforms don’t: true portability. If you ever decide to migrate to another platform, rebuild your publication on your own site, or move to a different email provider, you can bring your entire paid subscriber base with you. There’s no need to ask readers to resubscribe and no risk of losing the recurring revenue you worked hard to build.
The best part is that this backup layer requires no additional effort. The moment your publication connects to Stripe, your financial continuity is already protected. Even in a worst-case scenario, you still retain full access to your paying readers and the revenue they generate.

Want an Easier Way to Keep All This Organized?
If reading this made you think, “I should really get my drafts, brand assets, and backups in order… but I don’t have a great system for it,” you’re exactly who I built the Substack Creator OS for.
It’s the all-in-one workspace I use to run my publication like a real business. Inside, you’ll find dedicated spaces for:
A content calendar to plan and draft your articles, and backup the final version.
A brand vault to keep your brand assets safe in one place that’s easy to access anytime you need them.
A Substack export database where you can upload and store your weekly exports in an organized way.
Plus tons of other tools and resources to help you start, grow, and manage a successful Substack publication.
It’s everything you need to stay organized, consistent, and fully backed up—all in one clean, easy-to-use Notion system.

Right now, I’m giving annual Really Good Business Idea Premium members free access to the entire OS, plus lifetime updates as I keep improving it.
And if you’re currently reading as a free subscriber, this week is the perfect time to upgrade: I’m offering 50% off annual paid subscriptions for Black Friday, which gets you the Substack Creator OS instantly plus lifetime updates.
Your future self (the one running a bigger newsletter with way more moving parts) will be very glad you set this up now.
To endless possibilities,
Casandra
I recommend writing everything in your offline document editor of choice with the picture(s) having same file name as the document (post/page), so they line up in your folder. Do this before placing your content online. Backup your subscribers list often. If you need an offline editor with good compatibility with Microsoft Office files, check out free OnlyOffice.com download page for desktop. It works across macOS, Windows, and Linux.
This is great, Casandra! Have you also found an efficient way to back up your Notes?